Three Ways to Leverage Tech in Your Classroom
by Stephen Pham, Teacher, Sí Se Puede Academy
When looking around, you see that nearly every part of our daily lives is becoming (or is already) digitized. The digital age has shifted how we communicate, find information and experience entertainment. But it doesn’t stop there. Education, as a field that needs to stay on its toes, is being revolutionized with the use of technology as well. A great teacher is always key to a great classroom. However, with the right tools and proper systems, the strategic use of technology in the classroom can both increase teacher effectiveness and enhance student learning and engagement.
In this periodic column, I will share some tech practices I’ve implemented in my own classroom, both related to tools for teachers as well as tools for the classroom. Today, I share three easy ways to start leveraging technology in your classroom tomorrow.
1) GOOGLE CLASSROOM: The solution for document processing in the classroom
 Google Classroom allows teachers to easily create assignments for students with Google Docs attached. And that’s not all it does – Classroom will create a copy for each student from a template and automatically sharing access with teachers, taking a process that used to take hours and reducing it to about ten minutes. This tool thereby opens countless doors for class projects like essays, slideshows, creating polls and more.
When students are ready to submit their assignment, they simply press “Turn In,” and the assignment is updated on your dashboard as submitted and ready for grading. Teachers can then add comments and suggested edits, and even return the document to students for revision. With this integration of Google Drive, the entire writing process can live completely online.
Make it Happen
- Go to classroom.google.com and sign up for a FREE teacher account.
- Make sure each of your students has their own Google Account, and invite them to your class.
- To make an assignment, create a template (Google Doc, Google Slides, etc.) and add it as an attachment on the teacher dashboard. Here, you can make it view only, editable to the entire class, or make a copy for each student with automatic naming.
- Get students signed on, and the writing process begins!
[youtube https://www.youtube.com/watch?v=K26iyyQMp_g?rel=0]
2) REMIND: Keeping parents in the loop with
 Remind is the tool that you’ve been looking for to share information with all of your students’ parents in a quick, easy manner. Rather than sending individual text messages for homework updates or making calls home for every single reminder about school events, Remind allows you to send one quick message that goes to every registered phone number, whether it’s attached to a smartphone or not. Not to be confused with the regular check ins with parents in-person or over the phone, Remind’s messages are 1-way, meaning parents cannot send any messages back, and you don’t end up having an overwhelming group chat over the next parent-teacher meeting. You can even schedule messages to be sent ahead of time, so you can make sure that your students’ parents get the information they need to ensure their children can be successful at school.
Make it Happen
- Go to remind.com and sign up for a FREE teacher account. Pro Tip: Use Google to streamline your login processes!
- Create a new class or multiple new classes, if you’ll need to send out different reminders for different classes. Keep in mind that you’ll also be able to easily select parents within each class to message separately from the entire groups.
- Get parents signed up through one of two ways:
- Paste their phone numbers in the website, which will send them an invitation that they’ll have to accept on their phones.
- Send home the pre-made one-pager that has your special code, and parents sign up on their own time.
- Try your first message, and you’ll see how easy it really is!
[youtube https://www.youtube.com/watch?v=fUkhoTrUhkU?list=UUoDKNvbKN3IC1uT4kQ-wrOQ]
3) iPAD AS A DOC CAM: Flexible, interactive tech for direct instruction
 Replacing my document camera with my iPad has been one of the best improvements to my classroom’s functionality thus far. Instead of having an obtrusive projector cart and document camera in the middle of the room, I carry an iPad pre-loaded with all the documents for the lesson.
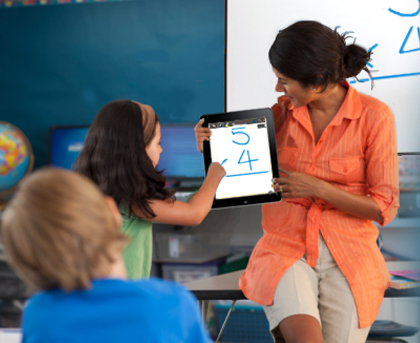
While walking around the room to monitor student work, I can correct a worksheet as students follow along, take a picture and display/annotate student work, or even start a timer for independent practice while playing some calm, focus oriented music – all from my iPad.
Taking it a step further, I even use it as my whiteboard – by using various (mostly free) apps on my iPad, I can write and draw virtually anything that I would’ve wanted to write or draw on a conventional whiteboard. I can even place the iPad on a student’s desk and let them take an at-bat to a problem we’re focused on in class. This mobility really helps with classroom efficiency, behavior management and it even reduces the number of copies needed, saving both paper and time.
Make it Happen
- Make sure you have an iPad (or even iPhone) that is AirPlay compatible.
- Using AirPlay Mirroring, you can mirror everything that shows up on your iPad onto a screen to:
- Apple TV $99
Apple TV allows you to stream videos from various online resources (Netflix, Hulu, Youtube, etc.), as well as mirror images from any Apple device. It’s basically a media all-in-one! - AirServer $14.99
AirServer – my personal preference – takes Apple’s AirPlay Mirroring feature and allows you to mirror iPads, iPhones, AND MacBooks onto any PC or MacBook! You can even mirror more than one device at a time – imagine having a class set of iPads projected onto the screen! Check out AirServer’s epic introduction here for a better visual.
- Apple TV $99
- Make sure both devices (iPad and Apple TV or AirServer device) are connected to the same wireless network. This is really important!
- On your iPad, slide up from the bottom of the screen, and click AirPlay, the device you want to mirror onto, and Mirror. You should be all set from there!
Click for more details about Apple AirPlay Mirroring.
These are just three tech tools for your class. One of the best ways to get started is to try implementing the system on your own time and put yourself in the shoes of your students (often by logging in using their accounts). It’ll give you perspective on what their initial experience will be.
Don’t be afraid to take a risk and try it in your classroom. Without fail, every tech related experiment I’ve tried has had technical difficulties on the first day. However, there are always solutions, and it typically ends up being worth the growing pains.
Follow Beyond to keep up with my tech tips! If you have any tech questions or suggestions, comment below or tweet at us!
For those Rocketeers out there, I will also have a tech integration collaborative during our October professional development week. Come by and get your classrooms set up!
Stephen is a fifth grade math teacher at Sí Se Puede Academy and a STEM Integration Associate for Rocketship’s network Achievement Team. He grew up in Southern California and attended the University of California, Los Angeles where he studied biophysics. After graduating, Stephen joined Teach for America and has been teaching at Rocketship ever since, now going into his third year. In his practice, Stephen strives to teach math through science and technology, getting students to apply their mathematical reasoning in a variety of ways. Stephen lives in San Francisco and enjoys spending time outdoors with friends.
Published on October 13, 2014
Read more stories about: Personalized Learning.


